Custom Patches are some of the most common decorations you can use for your shirts. With different patch backings, you will have several methods to attach patches on your shirt.
We have been producing kinds of patches since 2010. Here, we teach you how to attach them to your shirts easily and quickly.
How to Iron On A Patch On A Shirt?
Iron on is one of the most popular ways to attach custom patches to garment, clothes, or hoodies. It’s very easy and suitable for DIY, repair stories, small businesses, e-commerce brands, and pop culture stores. You don’t need to do complicated hand craft. All you need is an iron to do it. Please follow my complete guide step by step:
Step 1: Prepare and clean your shirt. Make sure they are free of dirt, hair, and other remnants.
Step 2: Cover the patch with thin fabric or parchment paper to avoid burning your shirt.
Step 3: Choose the right temperature for your shirt. It’s usually 160°C to 204°C depending on your fabric type.
Step 4: Use the tip of the iron to press on the patch starting from the middle. Wait for the backing to fully melt. Spend 30-60 seconds on the front side and 30 seconds on the back side.
Step 5: Remove the iron and let the patch cool down. It usually takes 5-10 minutes.
Step 6: Check if there are any spots left. Repeat the process until the patch is fully attached.
Tips:
If your shirt is made of silk, Please DO NOT use iron on, high temperature will damage your silk shirt. Iron on is perfect for cotton, polyester, and canvas. For nylon and polyester, use low temperature. For wool, use medium temperature. For cotton and linen, use a higher temperature.
If it’s your first time ironing a patch, it’s best to buy a few extra patches and test on an old or unused shirt first, just in case something goes wrong — don’t risk your favorite T-shirt.
How To Sew A Patch On A Shirt?
Sewing is a traditional method. When you put a patch through sewing, it lasts for a long life. No matter what kind of patch you use, it works. Now, there are mainly 2 sew ways: hand sew and machine sew.
Hand sewing is mostly used at home and for attaching a few patches while machine sew is used at clothes factories to attach many patches at once. In the next, I will teach you how to sew your patch perfectly in both ways. If you are a beginner, please strictly follow my steps.
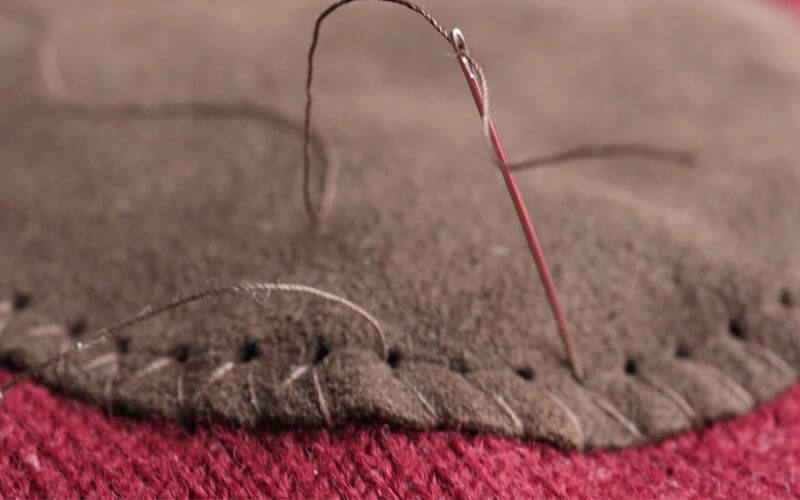
Hand Sew
Step 1: Choose your needle and thread of choice to match your clothes or patches before sewing
Step 2: Clean your patch and shirt. Hold the patch on your chosen location by using a tape or straight pins.
Step 3: Thread your noodle and cut the thread at an appropriate length. Knot the end of the thread.
Step 4: Push the needle through the insides of the shirt and the edge of the patch until you reach the knot.
Step 5: Push the needle back through the edge of the patch next to your first thread and push through your shirt.
Step 6: Repeat until you have fully attached the patch.
Step 7: For the last stitch, push the thread to the inside of your shirt and tie a knot.
Step 8: Cut any excess thread half an inch from the knot.
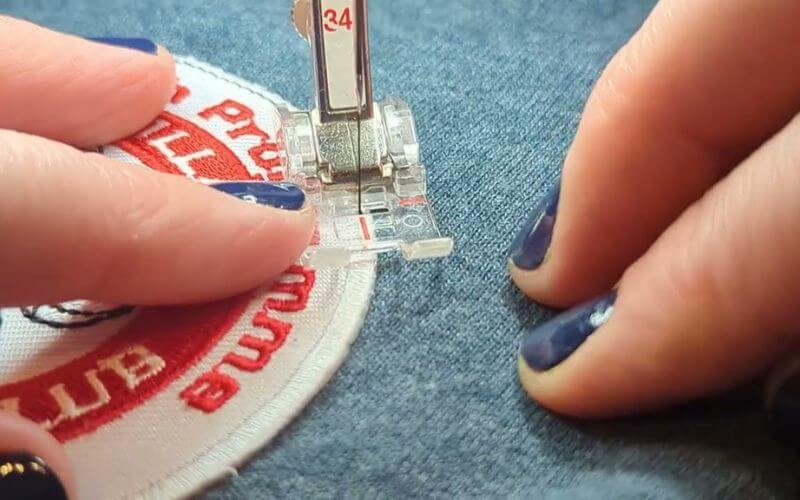
Machine Sew
Step 1: Prepare your sewing machine based on the instructions.
Step 2: Thread the needle.
Step 3: Slide your shirt under the sewing needle and place the patch on your desired location.
Step 4: Position the edge of the patch under the sewing needle.
Step 5: Lower the sewing machine’s presser on the patch.
Step 6: Set the machine on a low speed and straight stitch.
Step 7: Press the foot paddle.
Step 8: Carefully slide the patch and rotate around the corners. Once complete, run the needle over the first few stitches.
Step 9: Hit the reverse and do some backward stitches. Lift the presser and cut the thread.
Tip: Use an adhesive backing to fix the location before sewing to avoid moving the patch.
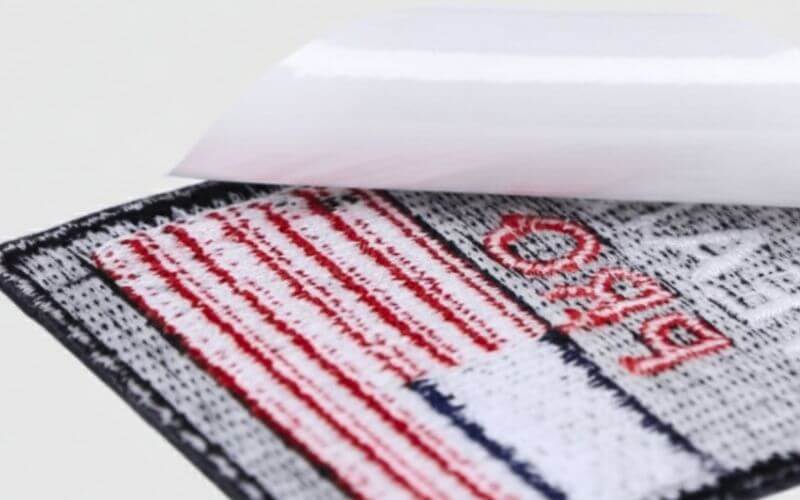
How To Put A Patch On A Shirt Using Adhesive?
If you want a flexible and fast way to put patches on your shirt, using an adhesive is the perfect choice. It works with a wide variety of fabrics or clothes. It’s the great choice for costumes, events, and other occasions. Here’s the step-by-step instructions to effectively attach the patch using adhesive.
Step 1: Pick the right adhesive for your fabric.
Step 2: Cut the adhesive to fit your patch.
Step 2: Apply the adhesive to the entire back of the patch.
Step 3: Press the patch on your desired placement.
Tip: If you want to temporarily put a patch on a shirt, adhesive is the best solution. It’s mostly used to fix the patch before sewing. Avoid multipurpose adhesives because they’re not effective in attaching patches.
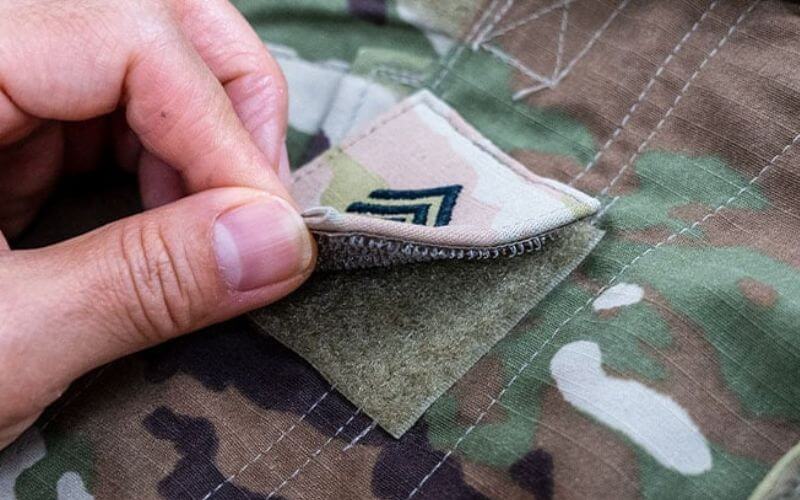
How To Put A Patch On A Shirt Using Velcro?
Velcro is the best choice if you want to reuse your patches on different clothes. You can easily remove them from your shirt and attach to another. It doesn’t cause permanent changes to the fabric. The steps to use velcro are easy and quick.
Step 1: Cut the velcro strips to match the size and shape of your patch.
Step 2: Glue the one side of the velcro to the patch and the other side to the shirt.
Step 3: Align the patch to the shirt and attach both sides of the velcro to each other.
Tips: velcro is suitable for uniforms like the military and police as well as other multipurpose clothes.
What To Consider Before Attaching A Patch?
Placement
Before choosing the method of attaching patches on clothes, you must first finalize the placement of your patch. If the placement is on the chest, consider choosing iron on or sewing. If it’s on the shoulder, velcro might be ideal for you. If it’s on the arm, adhesive is suggested. However, it mainly depends if you’re looking for a temporary or permanent solution.
Size
For small patches, iron on and sewing work well. For patches that are five inches or more, sewing, velcro, and adhesive are more suitable.
FAQs
1. Is it better to sew or iron on a patch?
It depends on your patch and intended use. Sewing is best for uniforms, backpacks, and hats. It’s the most durable and long lasting. Iron on is best for DIY projects and special events. It’s faster and easier.
2. How to apply a patch without an iron?
If you have no iron, you may attach patches through sewing, velcro, and adhesive.
3. Will an iron-on patch come off in the wash?
The patch may come off if not washed properly. Make sure to use cold water, delicate wash cycle, and mild detergent. Avoid using the dryer.
4. What are common mistakes when using iron-on patches?
Some common mistakes are using the wrong temperature, not using a protective cloth or parchment paper before ironing, not pressing hard enough, and using a dirty fabric or cloth.
5. Can you use a dryer as an iron?
No, you cannot use a dryer as an iron because it’s not hot enough.
6. How to get adhesive patches to stick?
Press the whole patch long and hard before running your fingers along all the areas.