How to Design Challenge Coins, Step by Step Guide For Beginner
To be successful in designing your challenge coins, your design should balance meaning, visual clarity, and production feasibility. It’s a structured yet creative process that boasts your organization while increasing value.
With this guide, I can help you make your custom design for your challenge coin step by step from defining the purpose of your challenge coins to your final approved design.
Step 1: Define the Purpose of the Challenge Coin
You have to choose the intention of your challenge coins. If it’s for military or first responder recognition, your design should highlight your unit insignia and name to show team identity and belongingness.
For corporate awards and branding, the design should focus on the brand’s logo and slogan to gather more attention. Challenge coins for clubs and organizations are also usually designed logos to boost visibility through merchandise.
Challenge coins can also be customized as merchandise for events and commemorations to celebrate an achievement or milestone. You have to first understand the meaning and aim of your challenge coins to create a strong foundation for your design.
Step 2: Choose the Shape and Size
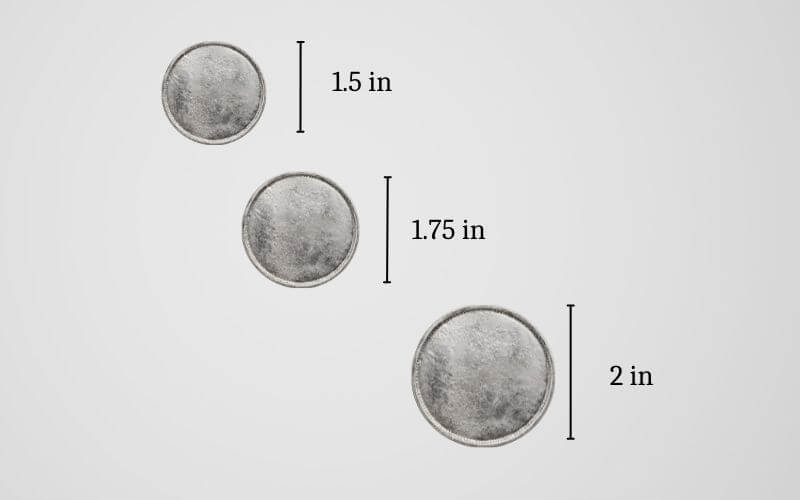
You have to choose the appropriate shape and size for your design and purpose. These two features greatly affect the appearance, cost, and readability of your challenge coins.
The common sizes for challenge coins are 1.5 in, 1.75 in, and 2 in. For shapes, the standard is round challenge coins. However, you can choose custom shapes like squares and cut-out designs. Larger challenge coins allow more details and texts in your design.
Step 3: Decide on Single Sided or Double Sided Design
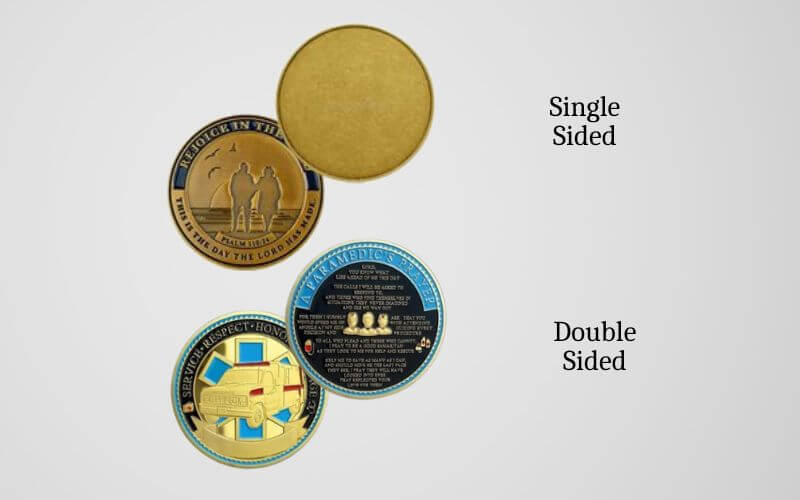
After finalizing the shape and size of your challenge coins, you have to decide if the design is one side or on both sides of the challenge coin. The layout will determine how your design will be presented.
One-sided designs are for simple and direct messages while double-sided designs are for complex and various information. You can decide what appears on either side.
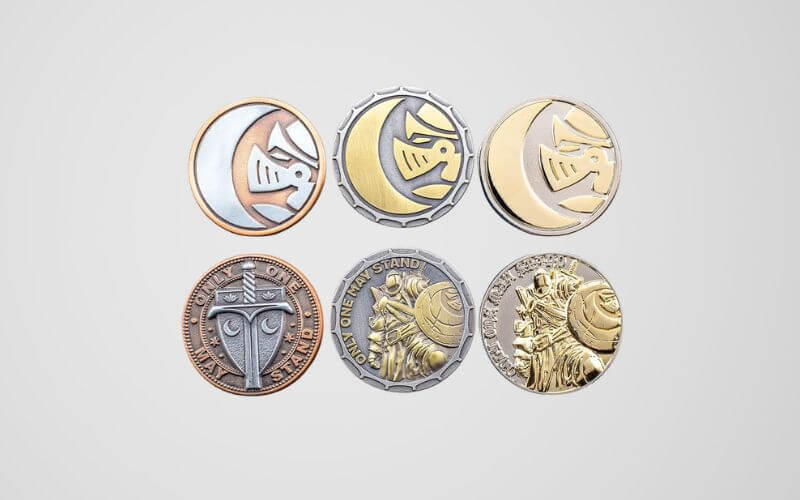
Step 4: Select the Design Style and Relief
Choosing a design style is important in order to define how the challenge coin looks and feels.
If you prefer a simple and straightforward customization, two dimensional designs with shallow relief will be enough to cover all details. For sculpted depth, three dimensional designs are more suitable. Multi-level designs are recommended for details with stronger visual contrast. In customization, more complex designs usually increase production cost.
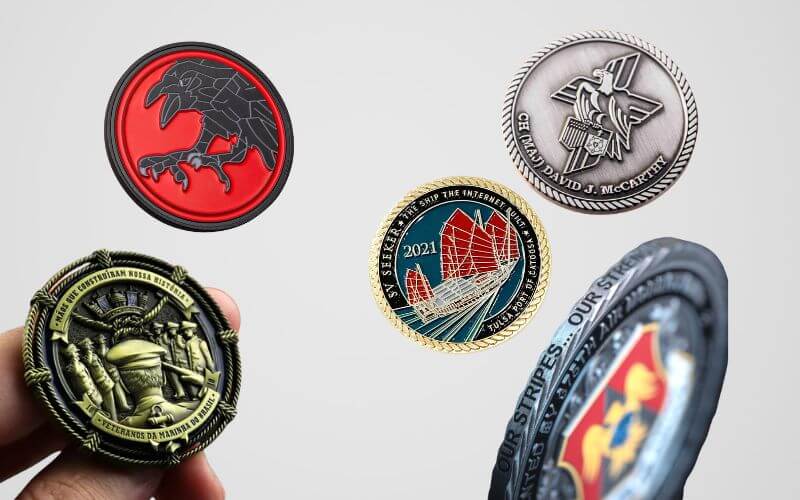
Step 5: Choose Symbols Text and Imagery
Symbols, texts, and imagery are important parts of your design. They fulfill the purpose and aim of your custom challenge coins. These visual elements communicate your meaning and identity.
Your challenge coins can be designed with logos, emblems, and insignias to symbolize your unit, organization, or company. You can also add more information through text like unit names, mottos, and dates. It’s better to keep your texts readable even at small sizes.
For more fun options, icons like mascots and symbolic imagery can make your challenge coins more visible.
Step 6: Pick the Metal Finish and Plating
After finalizing your design style and details, you will have to choose the metal finish and plating of your challenge coins.
The most common choices are gold, silver, copper, and black nickel finishes. You can choose polished finishes for a bright appearance or antique finishes for a classier look. Metal finishes are what set the overall tone of your coins
Step 7: Decide on Enamel Color Options
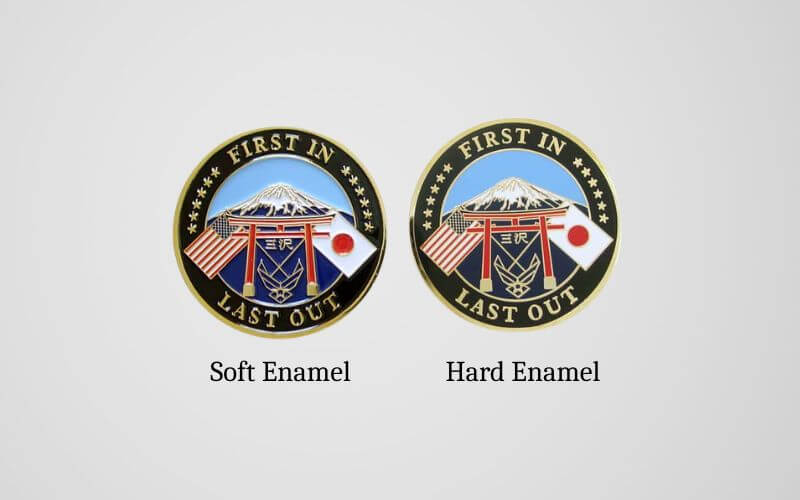
If you picked an enamel design for your challenge coins, there are various color styles you can choose from. Soft enamel is perfect for a textured and traditional enamel design. For a smoother and modern look, hard enamel is more suitable.
The colors in design enhance design visibility and impact. You can also avail them to match the branding of your unit, uniforms, or brand.
Step 8: Consider Edge Options and Special Features
Challenge coins have other special features like edges, serial numbers, and laser engravings. These features can elevate your final design.
For edges, people usually customize their challenge coins with flat edge rope or diamond cut edge. For limited or special editions, companies put serial numbers on the back of the coins. In the military units, challenge coins are laser engraved with names, ranks, or dates.
Step 9: Review Manufacturability and Cost
Since customization is ordered in bulk, your designs must be practical to produce and sell. Before finalizing your design, you must review the manufacturability and overall cost of your order.
You will need to ensure that the details are not too small or thin. You also have to avoid excessive text that can overcomplicate your design. It’s important to balance complexity with your budget and purpose.
Step 10: Final Proof Approval Before Production
After finishing all other steps, the last step you have to do is review your final design for any adjustments or corrections.
You will have to review digital proofs carefully for any mistakes. Check the spelling layout and proportions in case of errors. For the design, you need to confirm the color finishes and dimensions.
FAQs
- Can You Design Your Own Challenge Coin?
- Yes. You can design every feature of your challenge coin to fit your theme or brand.
- How Much Does It Cost To Design A Challenge Coin?
- The price depends on the product quantity and design style. It usually costs $2.09-$4/pc.
- What Makes A Good Challenge Coin?
- A good challenge coin is when it represents your unit, team, brand, corporation, or honor.
- What Are Common Challenge Coin Mistakes?
- Some common challenge coin mistakes are overcrowding your design, poor design quality, and little functionality.
- What Is The Best Way To Display Challenge Coins?
- People usually store their challenge coins in velvet pouches.